MCP Bridge (Windows)
Local-first-MCP-Hub und Servermanager für Windows mit Echtzeit-Toolwechsel, Multi-Client-Routing und Tailscale Funnel für Web-KI.
Dokumentation


mcpBridge
Unified Local Hub & MCP Server Manager for Windows
Connect all your local MCP servers to any Browser AI or Desktop client via a single link — powered by Zero-Tax Hot-Swap architecture and managed from one window.








Zero-Tax Hot-Swap: Token Saving & Live Switching
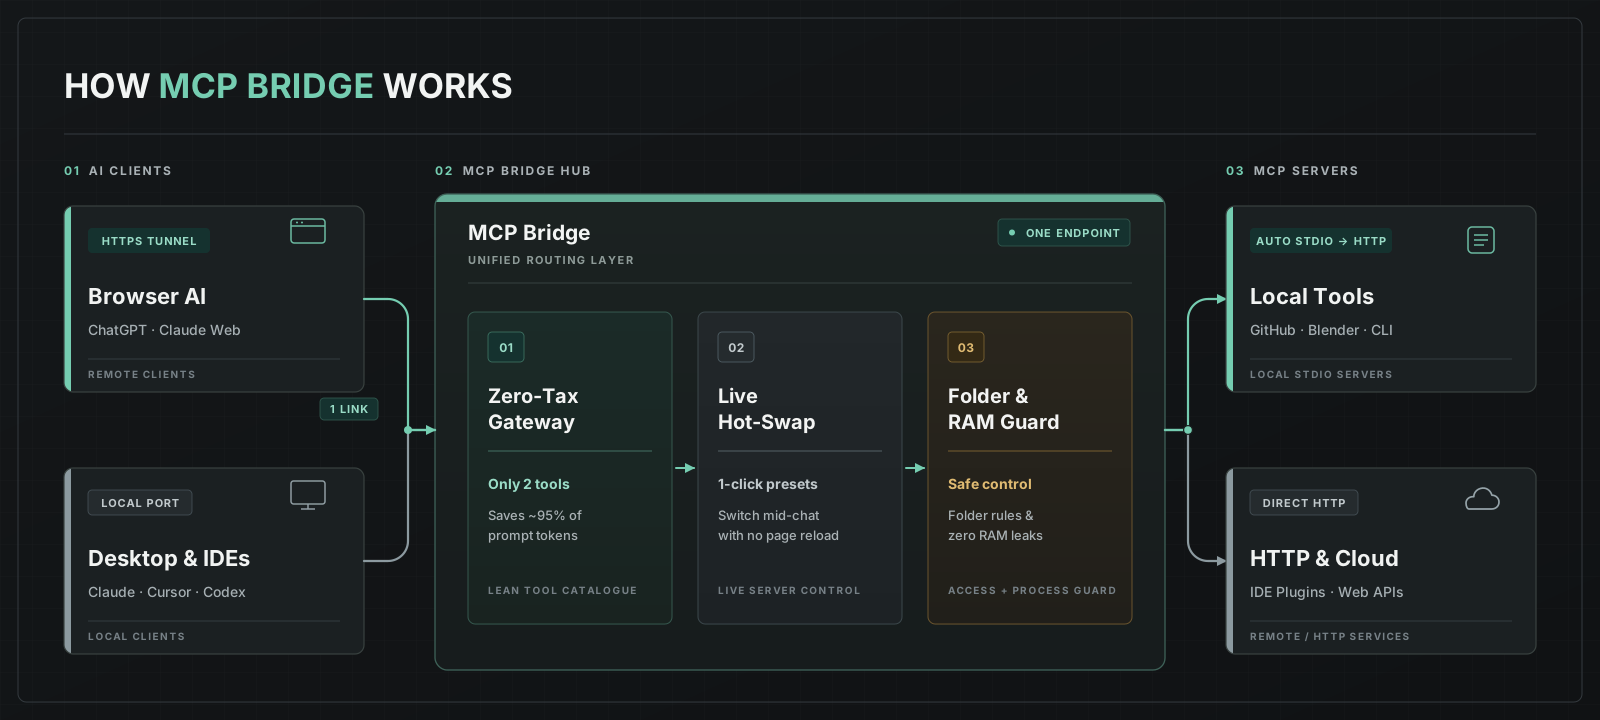
In standard clients, tool schemas from every connected server remain in context even when idle. MCP Bridge exposes only 2 lightweight meta-tools ( all_tools and call_tool) upfront, and whenever you uncheck an unused server in the app window, its schemas are immediately excluded from the gateway catalogue — without restarting the chat or losing conversation history.
|
One Connection, 1-Click Presets & Smart Import
Group servers into task-specific Server Presets and switch workflows in 1 click without dropping active sessions. When adding a new server, smart clipboard import automatically parses mcpServers JSON blocks, CLI commands, or URLs.
|
Local STDIO Servers for Browser AI
Built-in Supergateway and Tailscale Funnel expose local STDIO servers over Streamable HTTP without router port forwarding and without modifying Windows DNS settings (accept-dns=false). Pre-existing Tailscale installations and preferences are preserved untouched.
|
Process & RAM Control — No Zombie Processes
Managed child processes are assigned to a Windows Job Object (JOB_OBJECT_LIMIT_KILL_ON_JOB_CLOSE). Additional descendant cleanup (Toolhelp) and startup WMI/TCP checks help terminate Bridge-managed process trees and prevent orphaned node.exe or python.exe processes.
|
Verification Sandbox, Quarantine & Auto-Wait
New servers pass through a 4-stage verification pipeline ( Pre-flight → Transport → Initialize → Tools). Lightweight socket hooks automatically detect whether a STDIO server connects to a local application port (e.g., a 3D editor, IDE, or local DB) or a remote API, keeping the server in WAITING while the target app is closed.
|
Live Folder Security & Everything Included
The internal roots-filter strips client-supplied roots capabilities on initialize so remote clients cannot override your local folder allow-list. Remote servers require explicit per-origin HTTPS trust approval, and API keys or Bearer tokens are automatically redacted ([REDACTED]) in logs.
|
Live Demo: Saving Context Tokens by Disabling Unused MCP Servers on the Fly |
|---|
|
When you dynamically disable unused MCP servers in MCP Bridge right during an active chat, their tools immediately stop being sent to the dialogue without reloading the browser page — drastically reducing context token consumption: |


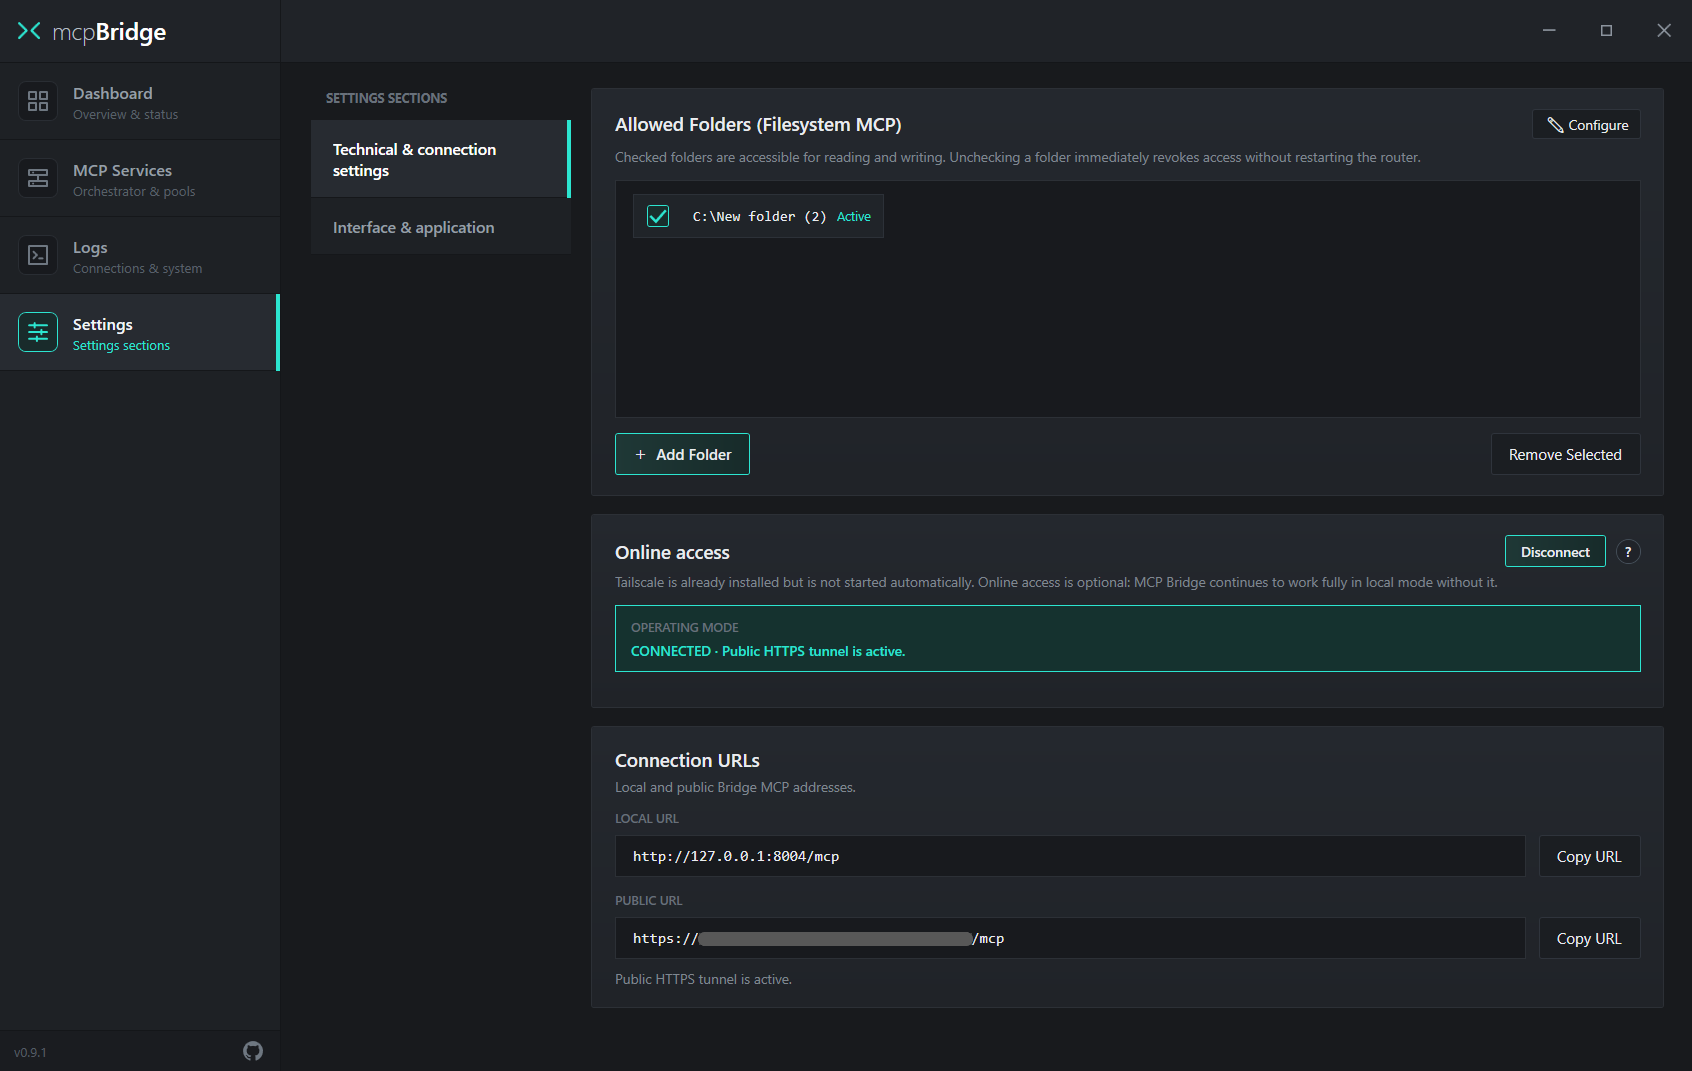
Open the Settings tab — here you configure folder access, the public tunnel, and copy the connection URLs for your AI client:
1. Allowed Folders | 2. Online access | 3. Connection URLs |
|---|---|---|
Directories accessible to the built-in Filesystem MCP. Uncheck any folder to revoke AI access immediately without restarting the gateway.
|
Enables the public HTTPS tunnel via Tailscale Funnel. Required only for web-based AI apps. Local desktop clients on your PC work without it.
|
Ready-to-use gateway endpoints. Click Copy URL next to the address you need and paste it into your AI client settings.
|
LOCAL URL — | PUBLIC URL — |
|---|---|
For applications installed on your PC (IDEs, desktop AI clients, local agents). Add a Streamable HTTP connection in your app's MCP settings and paste this URL.
| For web AI applications that support MCP. Depending on the service, this section may be called connectors, plugins, integrations, or connected via third-party extensions — simply paste the copied URL there. |

When clicking Connect under Online access for the first time, complete these three screens in order:
STEP 1 · Welcome to Tailscale | STEP 2 · Sign In & Connect | STEP 3 · Start using Funnel |
|---|---|---|
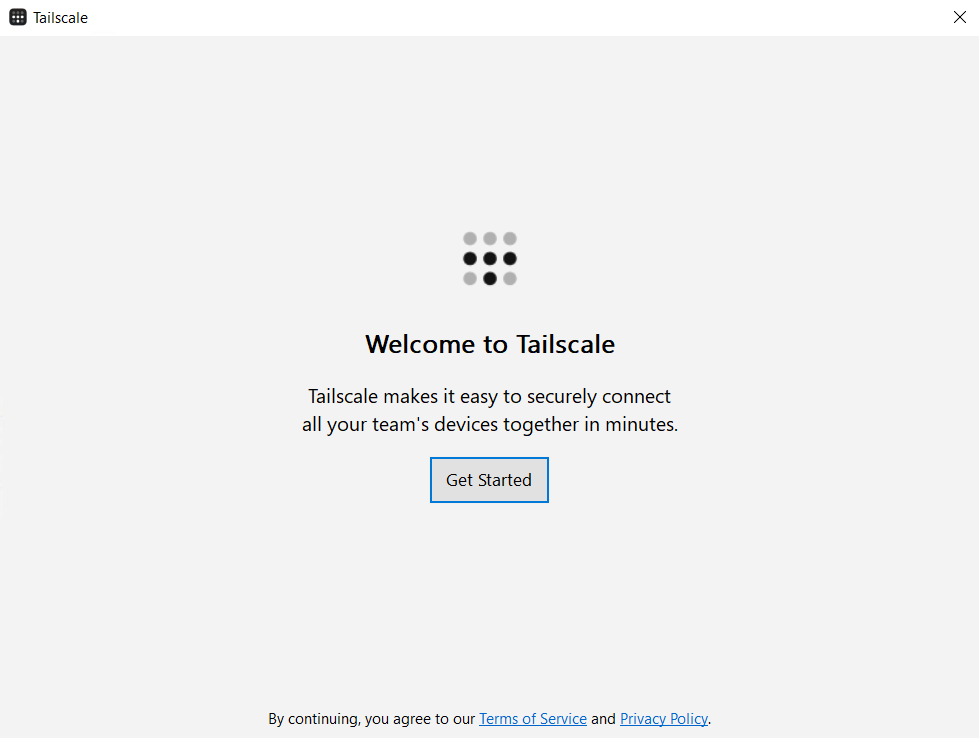 The Tailscale application window will open. Click Get Started.
|
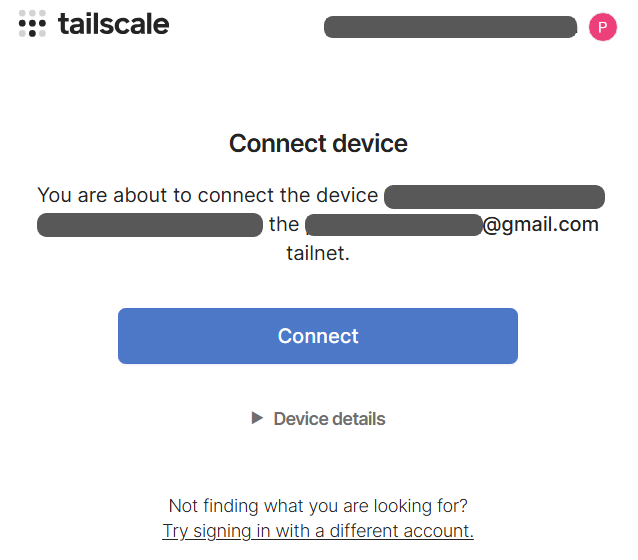 A login page will open in your browser — sign in to your account, then click Connect on the Connect device screen.
|
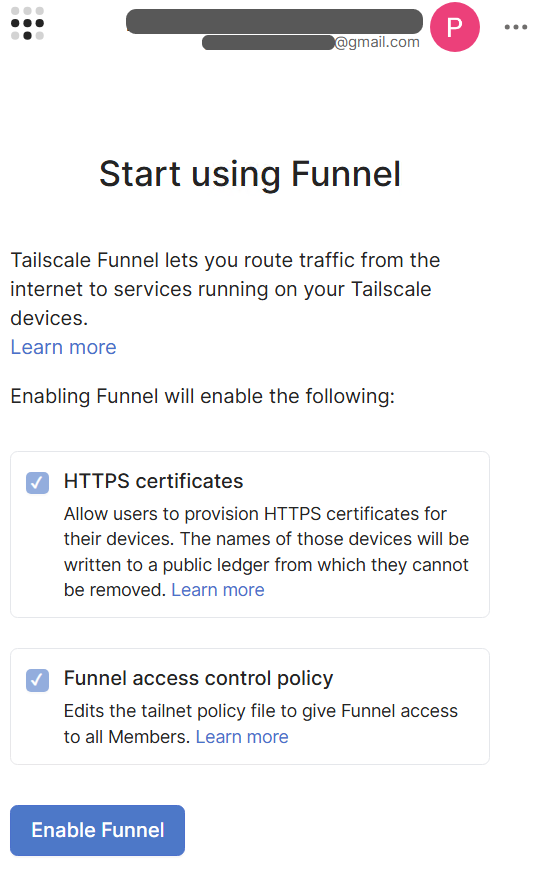 The Start using Funnel page will open automatically. Scroll down, click Enable Funnel, and wait for the connection to finish.
|


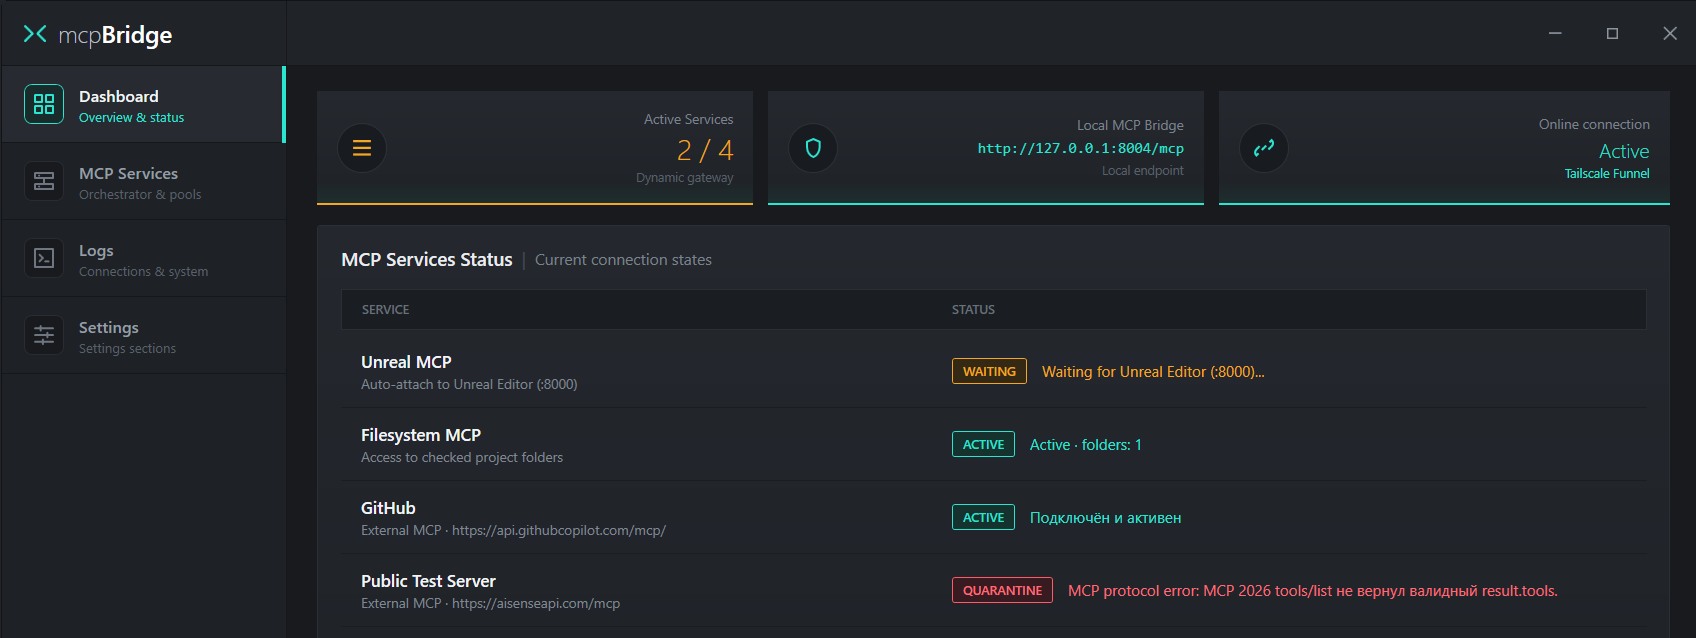
The Dashboard tab shows the gateway overview and currently enabled servers. Disabled servers (DISABLED) are hidden from the MCP Services Status table to keep it clean — they are visible in the MCP Services tab.
 |  |  |  |
|---|---|---|---|
| The server is connected, verified, and exposing its tools to the chat. | Waiting for a local application or endpoint to become available (e.g., an IDE, 3D editor, or local service). | Startup or MCP protocol error. The server is isolated so other services keep working. | Manually disabled by the user (shown only in the MCP Services tab). |

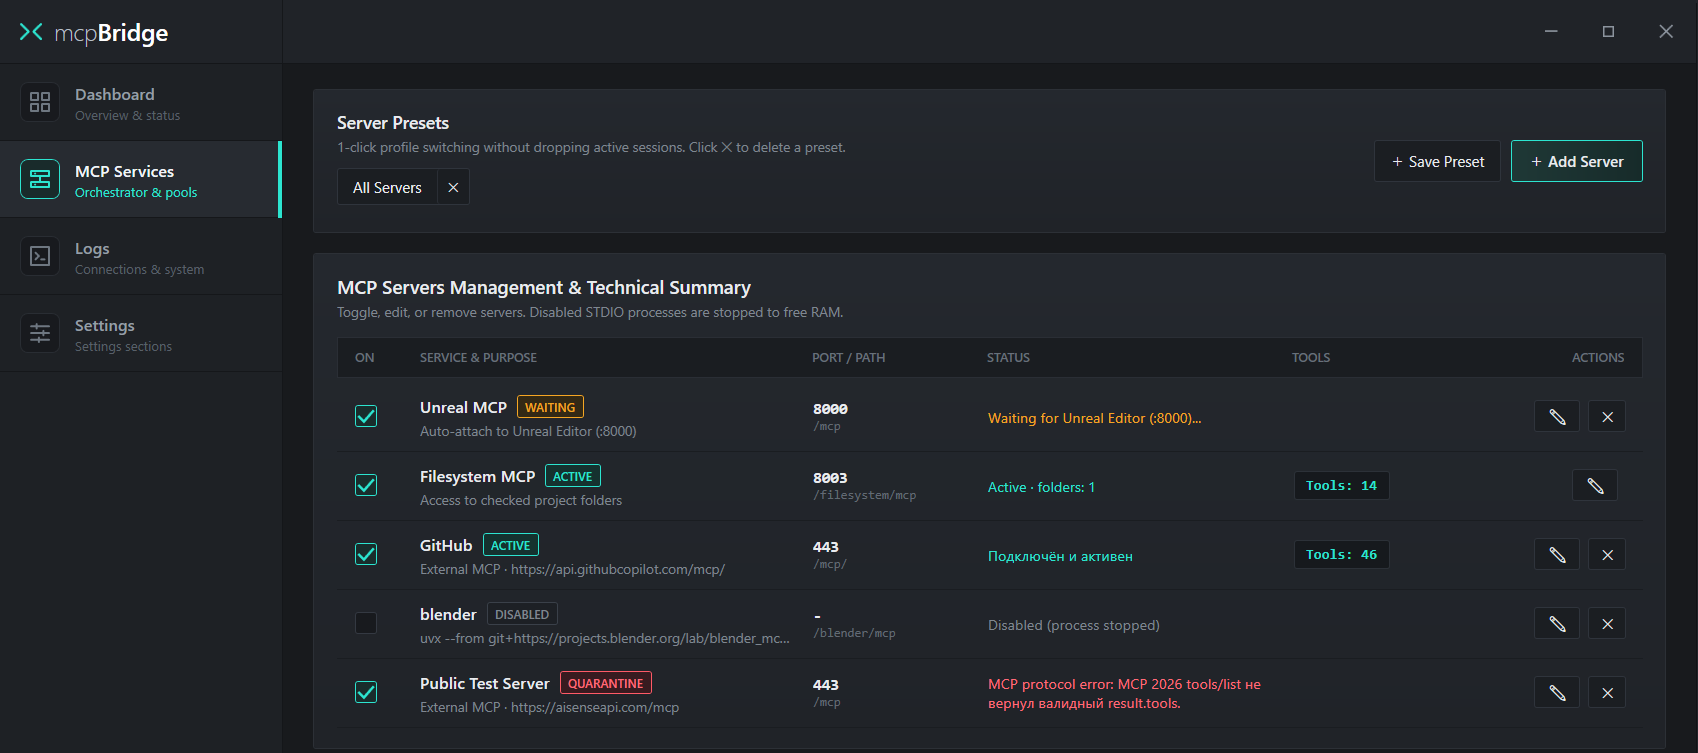
How Real-Time Server Switching Works |
|---|
| You can enable or disable any servers right during an active conversation with the AI. At any given moment, only the tools belonging to currently enabled servers are available in the dialogue. You do not need to reload the browser page, restart your local client, or manually refresh the tool list in your AI settings — the gateway updates the available tools automatically. |
Server Presets | Enable (ON) & Tools | Edit & Remove |
|---|---|---|
Click Save Preset to save the currently enabled combination of servers. Switch between saved profiles in 1 click without interrupting your session.
|
The ON checkbox makes a server available to the chat. When disabled, Bridge stops its managed process tree through Windows Job Objects, releasing the memory used by those processes. Tools: N shows the number of available tools.
| The ✎ button opens the JSON configuration editor for the selected server, and ✕ removes the server from the list. |
Under the Hood: 2-Meta-Tool Architecture ( |
|---|
MCP Bridge uses Model-Directed Tool Discovery (MTD): a model-directed way to discover and invoke tools. The external gateway at :8004/mcp exposes only 2 meta-tools: all_tools and call_tool. Unlike semantic Smart Routing — where an external mechanism guesses relevant tools by keyword similarity — with MTD the model requests the live catalogue snapshot through all_tools (served from the internal Poll Manager cache with catalog_revision tracking), selects the exact tool it needs, and invokes it via call_tool with JSON Schema validation. This also eliminates reliance on how individual AI clients handle notifications/tools/list_changed or cache tools/list.
|

Click + Add Server in the MCP Services tab to add a new local or remote server:
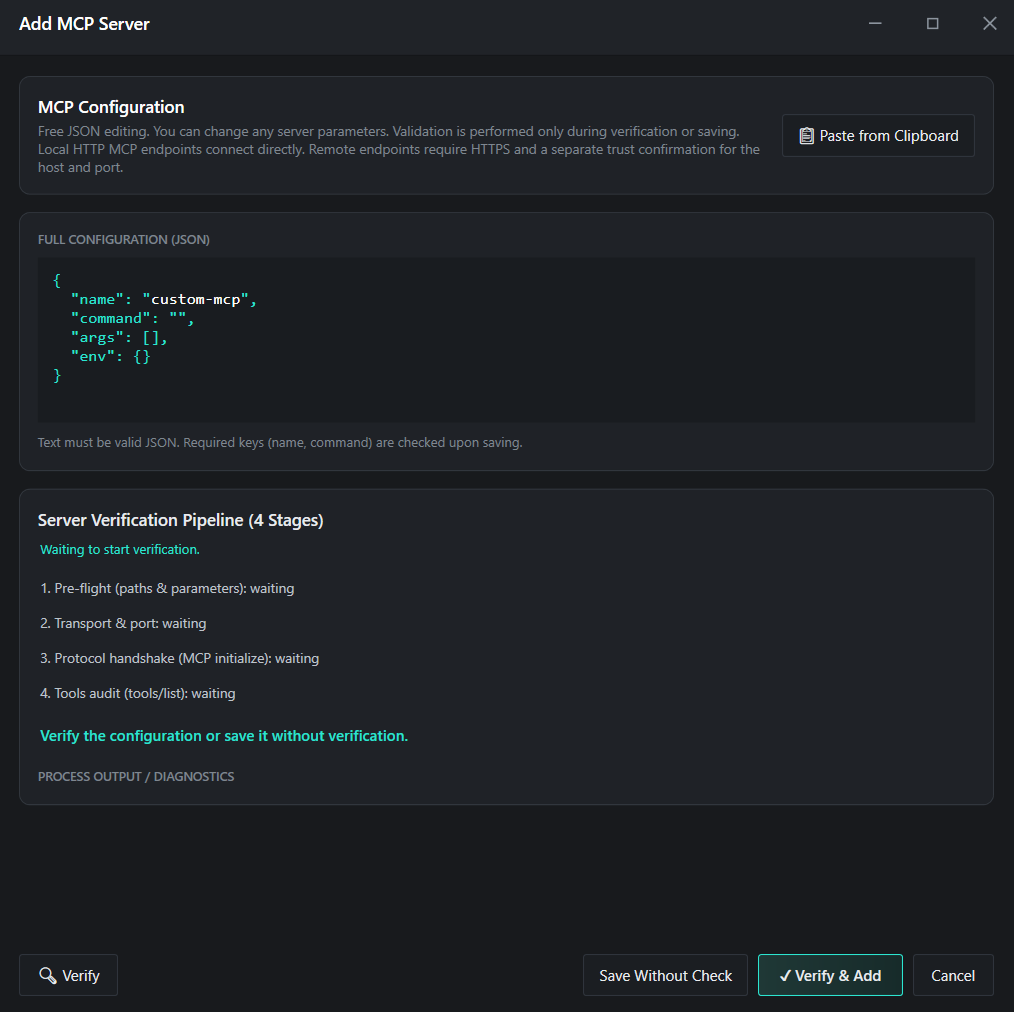
1. Paste JSON | 2. Verify & Add | 3. Save Without Check |
|---|---|---|
Copy a standard mcpServers block from the server's documentation and click Paste from Clipboard (or edit the JSON manually).
| Click Verify & Add — Bridge will test the startup, discover its tools, and immediately attach the server to the gateway. |
If the server depends on an external app that is currently closed, click Save Without Check — it will be added in WAITING mode.
|


1. Full Access to Allowed Folders | 2. Running Third-Party STDIO Processes |
|---|---|
The built-in Filesystem MCP grants the AI permission to read, modify, and delete files inside checked directories in Allowed Folders. Never expose entire system drives (C:\) or folders containing passwords, wallets, or SSH keys.
|
Any CLI server you add (npx, uvx, python, node, .exe) runs on your PC under your Windows user account. Only add servers and packages from sources you completely trust.
|
3. Public Tailscale Funnel URL | 4. Local Storage of Keys & Tokens |
When the tunnel is enabled, your PUBLIC URL is reachable from the internet by anyone who knows the address. Never share this URL publicly or expose it in screenshots, and click Disconnect when you no longer need remote access.
|
Configured environment variables (env) and HTTP authorization headers (Authorization / API keys) are stored locally in plain text inside Config/settings.json. Do not share this file with others.
|

System Requirements
Windows 10 x64 (1903+) / Windows 11 x64 · .NET Framework 4.8Security · Third-Party Notices