Abyssale
Abyssale — Browse, generate and import Abyssale designs — banners, video, PDF — from your AI client.
Documentation
Abyssale's MCP server lets an AI assistant act on your Abyssale workspace directly from a conversation: browse and search your designs and projects, find fonts by name, style or weight, check credits, generate banners, videos and PDFs, import new designs from JSON, and rename, move or delete existing ones, without you writing any code against the REST API yourself. It speaks the standard MCP protocol.
Claude Code CLI, Claude.ai, ChatGPT/Codex, Cursor, and Lovable, for now
Claude Code CLI, Claude.ai, ChatGPT/Codex, Cursor, and Lovable are registered clients today. Other MCP clients (Claude Desktop, and so on) aren't registered yet — this page will list each one's setup as it's added.
Connect
| Property | Detail |
|---|---|
| Endpoint | https://mcp.abyssale.com/mcp |
| Transport | Streamable HTTP |
| Method | POST only |
| Sessions | None — stateless, so nothing to reconnect or expire |
| Auth | OAuth (Auth0) — see Authentication |
Point an MCP client at the endpoint above. Claude Code CLI and Cursor also need their own registered client id to complete the OAuth login; Claude.ai, ChatGPT/Codex, and Lovable don't.
Claude Code CLI
claude mcp add --transport http --client-id tpc_iJ7LWqVdzR7c7jf21gMqDQ --callback-port 3418 \
  -s user abyssale_prod https://mcp.abyssale.com/mcp
--client-id and --callback-port are required
Both flags are required for Claude Code CLI, exactly as shown — the OAuth login fails without them. The client id above (tpc_iJ7LWqVdzR7c7jf21gMqDQ) is registered specifically for Claude Code CLI and won't work for another client.
Claude.ai
- In Claude.ai, go to Settings → Connectors → Add custom connector.
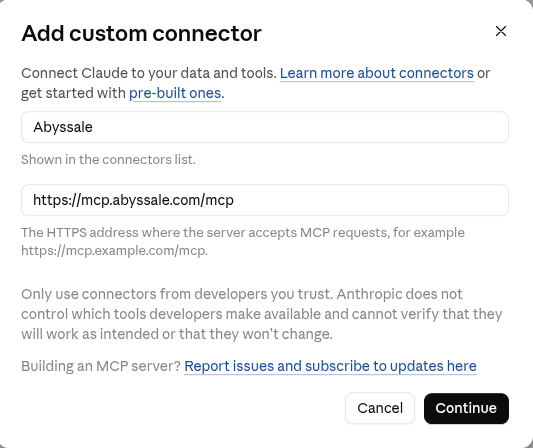
- Set Name to
Abyssaleand Remote MCP server URL tohttps://mcp.abyssale.com/mcp, then click Continue.
- Leave the detected defaults: Authentication on Sign in now and OAuth client on Use Claude's published identity — there's no client id to enter.
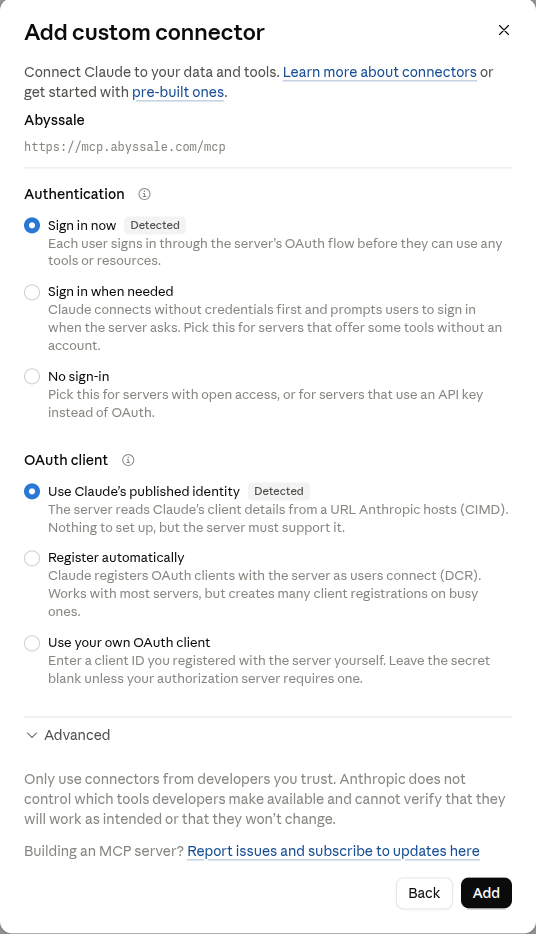
- Click Add, then complete the login and consent step that follows.
Optional: uploading local files when creating a design
Only needed when you import images from files on your own machine (a bare filename in import_design_from_json 's payload). Images given as an already-hosted URL or as inline image data don't need it.
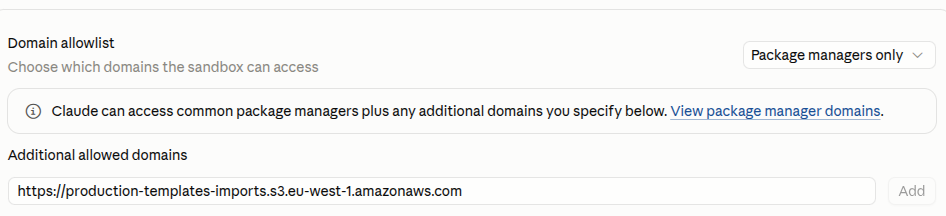
That upload path needs Claude.ai's sandbox to reach Abyssale's upload bucket, so a Claude.ai workspace admin has to add it to the domain allowlist first:
- Go to claude.ai/admin-settings/capabilities.
- Under Domain allowlist → Additional allowed domains, add
https://production-templates-imports.s3.eu-west-1.amazonaws.comand click Add.
ChatGPT/Codex
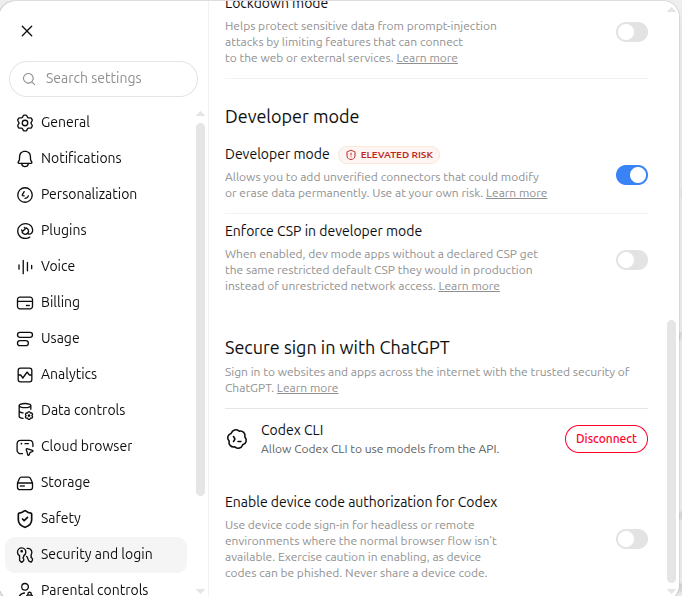
- In ChatGPT, go to Settings → Security and login and turn on Developer mode.
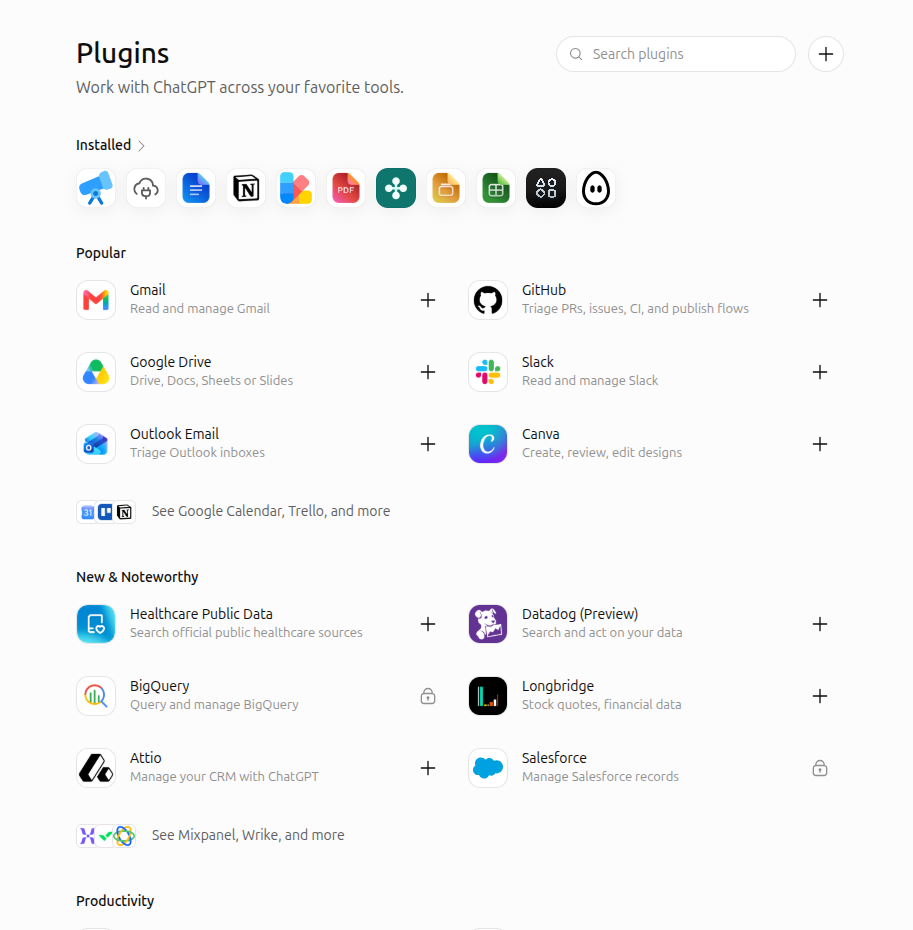
- Go to Settings → Plugins (or chatgpt.com/plugins) and click Create MCP app. On the web, the button's label varies — it may read Create app instead.
- Fill in the New Plugin form: set Name to
Abyssale, and under Connection set Server URL tohttps://mcp.abyssale.com/mcp. Leave Authentication onOAuthand don't touch Advanced OAuth settings — there's no client id to enter. Check I understand and want to continue.
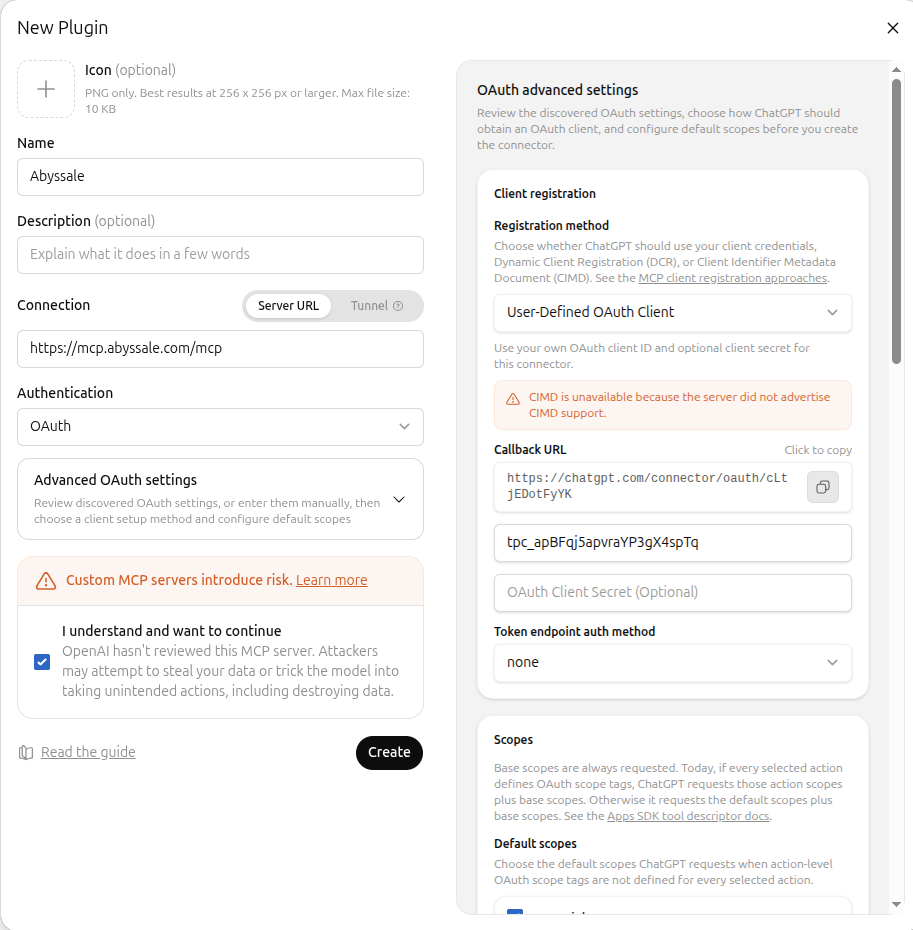
- Click Create, then complete the login and consent step that follows.
One setup, two apps
Connectors added on the ChatGPT website are shared with the Codex app — no separate setup needed there.
Cursor
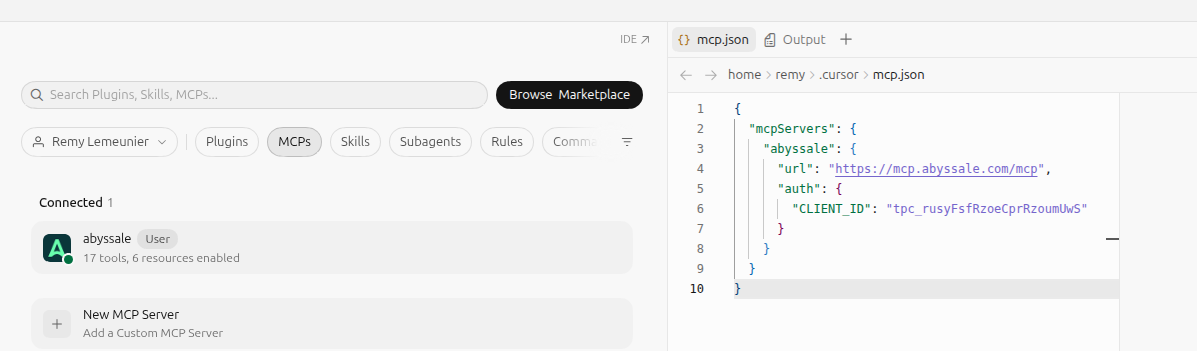
- In Cursor, go to Settings → MCPs, then click New MCP Server. This opens
~/.cursor/mcp.jsonin the editor. - Add an
abyssaleentry with the endpoint and the client id below, then save the file.
{
  "mcpServers": {
    "abyssale": {
      "url": "https://mcp.abyssale.com/mcp",
      "auth": {
        "CLIENT_ID": "tpc_rusyFsfRzoeCprRzoumUwS"
      }
    }
  }
}
- Complete the login and consent step that opens in your browser. Back in Settings → MCPs,
abyssaleshows as Connected once it's done.
This client id is specific to Cursor
The id above (tpc_rusyFsfRzoeCprRzoumUwS) is registered specifically for Cursor and won't work for Claude Code CLI, which uses its own id (see above).
Cursor's OAuth callback port isn't configurable
Cursor's desktop app always redirects to http://localhost:8787/callback — there's no mcp.json setting to change that port, unlike Claude Code CLI's --callback-port flag.
Lovable
- In Lovable, open Connectors, click + in the top right, and choose MCP server.
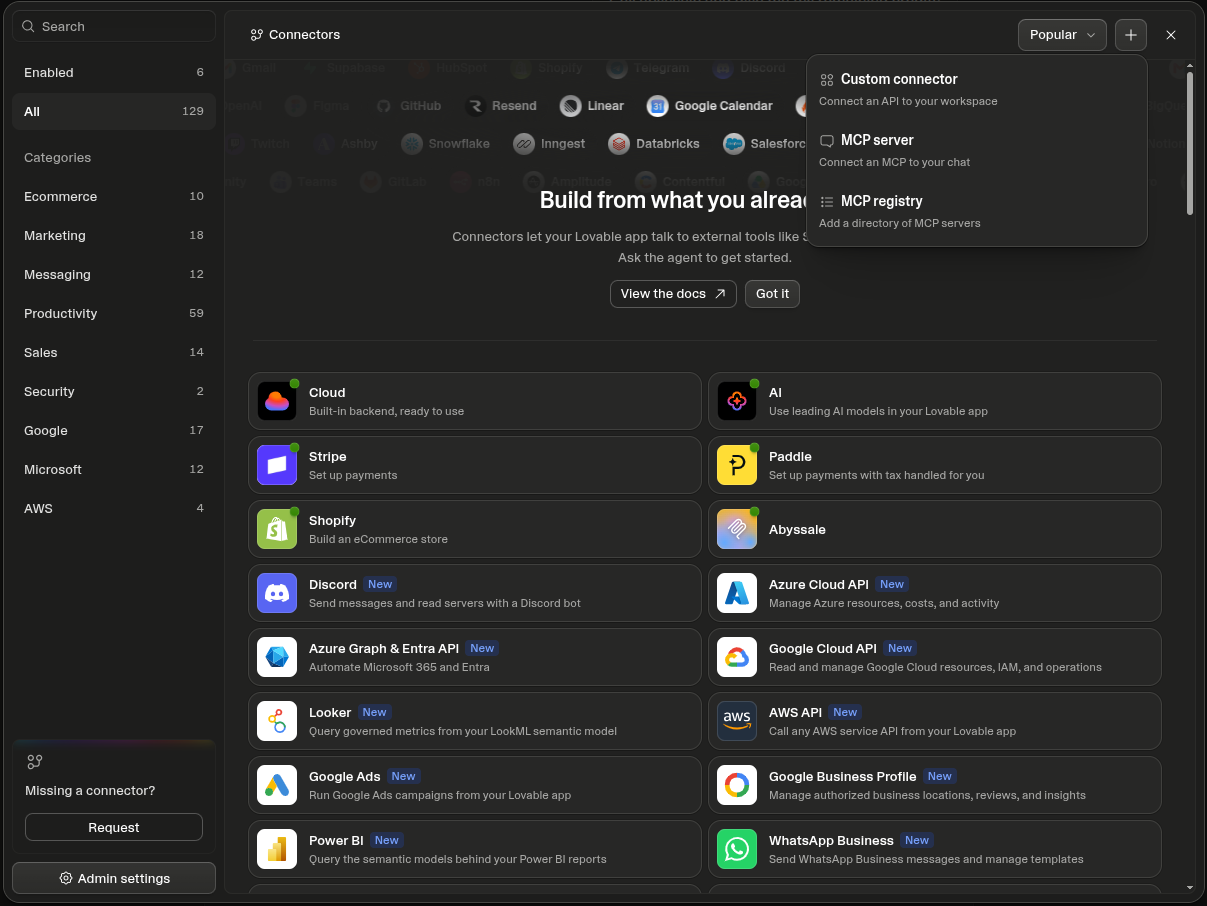
- Set Server name to
Abyssaleand Server URL tohttps://mcp.abyssale.com/mcp. Leave Authentication on OAuth (default) — there's no client id to enter.
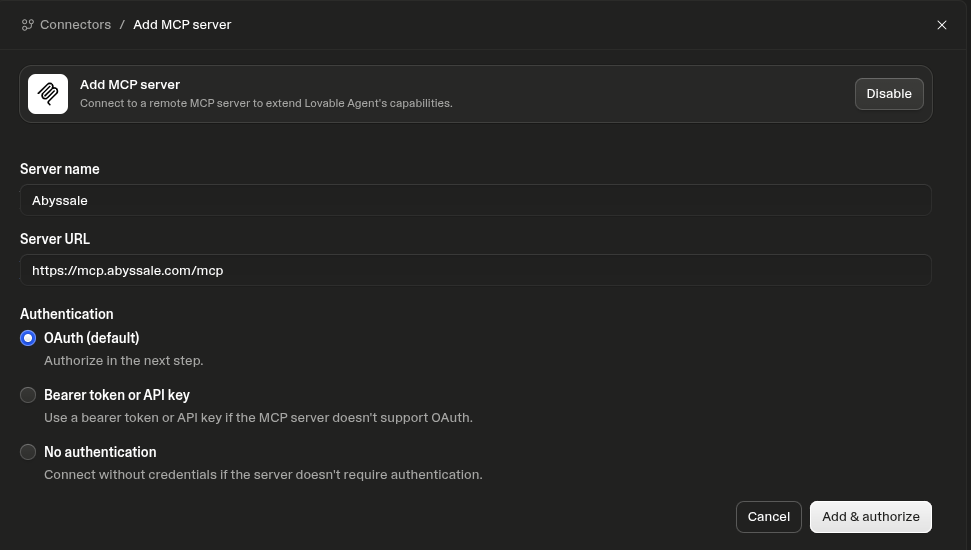
- Click Add & authorize, then complete the login and consent step that follows.
Connecting the client triggers a login and consent step in your browser. See Authentication for what that requires and what it grants.
Where to go next
- Authentication — how you sign in, and what each permission scope unlocks.
- Tools reference — every tool, its parameters, and an example call.
- Permissions — what each tool can actually do, and what to check before you authorize it.
Support
Something not working, or a question the docs don't answer? Reach the Abyssale team through the help center.