CalendarBridge MCP
officialSync Calendars, Scheduling Links, AI Executive Scheduling Assistant, Unified Calendar
What can you do with CalendarBridge MCP?
- Check your schedule — Ask your assistant to list calendars and read events for any date range across Google, Outlook, or iCloud.
- Manage events — Create, edit, reschedule, or delete calendar events by describing what you need in plain language.
- Build booking links — Create, edit, or delete schedulers and get shareable links for others to book time with you.
- Set up calendar syncs — Create, edit, or delete one-way or two-way syncs between your calendars, with busy-time visibility options.
- Manage connected accounts — List your connected calendar accounts and get links to connect, re-authenticate, or remove them.
- Drive your AI assistant — Send new messages or replies through your AI Scheduling Assistant and review recent conversations.
Documentation
Connect your own AI agent — Claude, ChatGPT, Cursor, and other MCP-compatible clients — directly to your CalendarBridge account. Your agent can read and manage your calendars, events, schedulers, and syncs on your behalf, with permissions you control.
Bring Your Own Agent uses MCP (the Model Context Protocol) — an open standard that lets AI assistants connect to outside tools. CalendarBridge runs a hosted MCP server, so any MCP-capable client can connect to your account and act on your calendars for you.
This is different from the CalendarBridge AI Scheduling Assistant, which schedules over email. With Bring Your Own Agent, you bring the AI (the one you already use and pay for) and point it at CalendarBridge.
Manage your calendars with the CalendarBridge MCP server
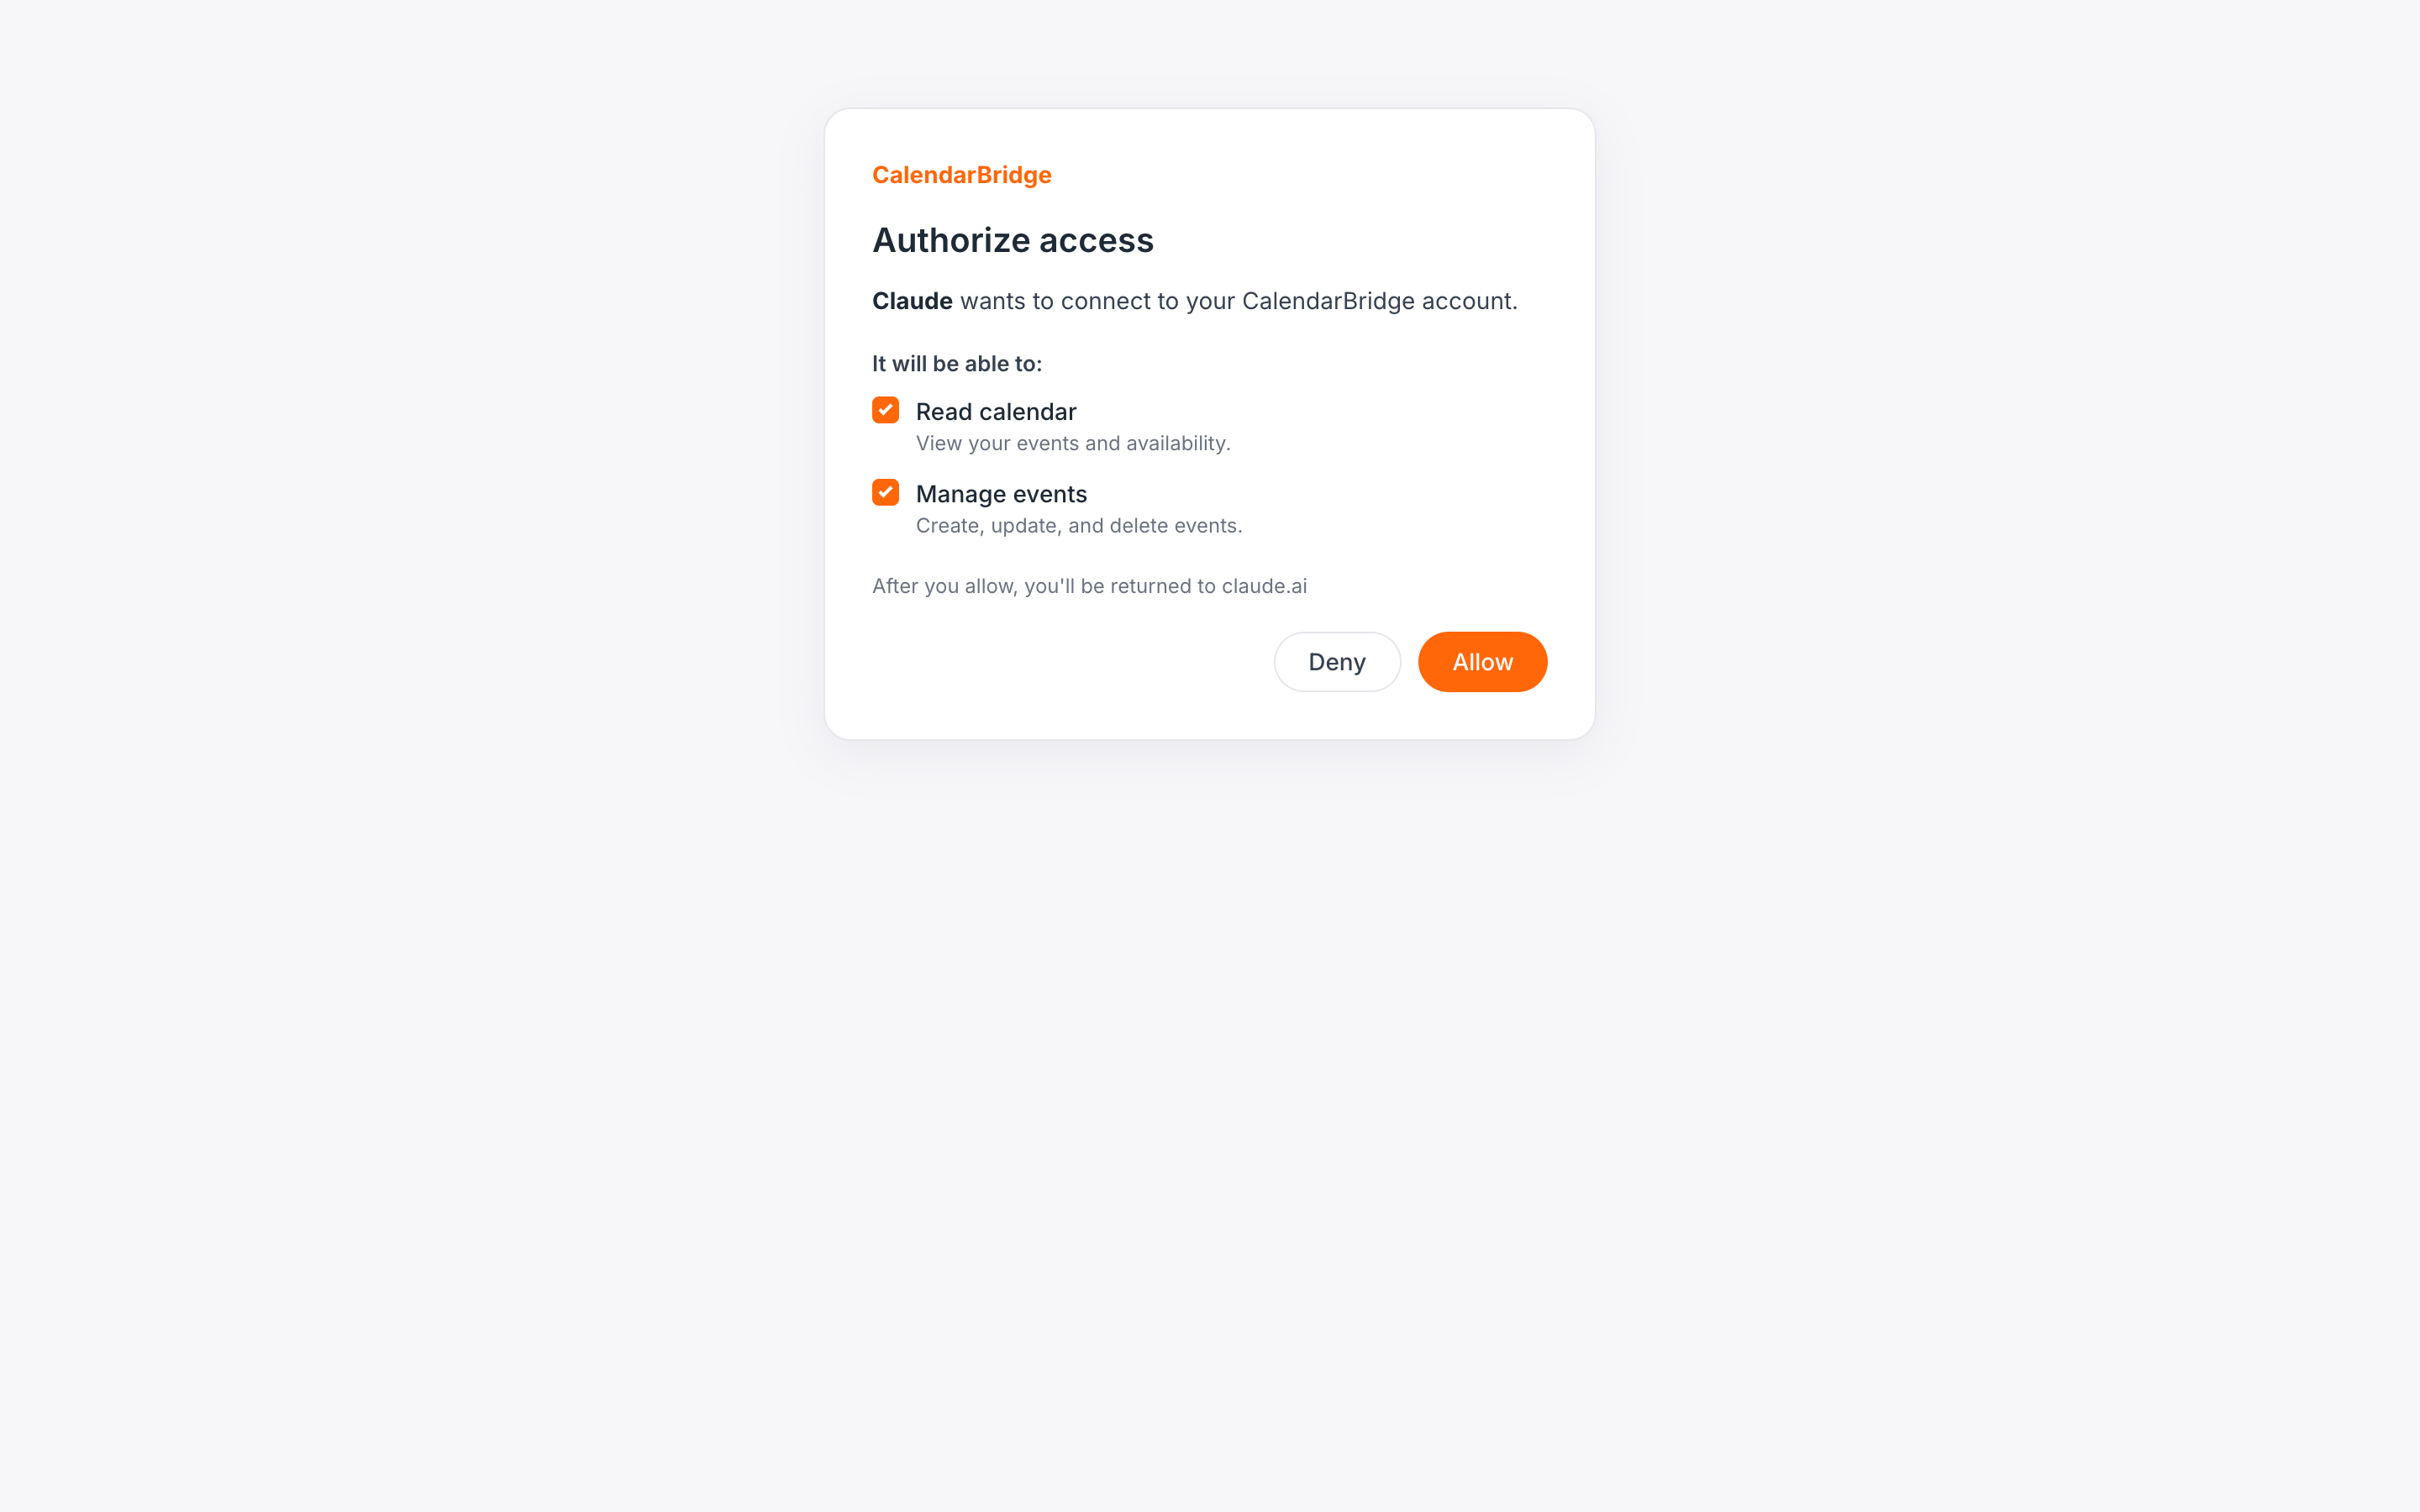
Authorize an external agent (MCP)
The CalendarBridge MCP server turns your AI assistant into a calendar manager. Once you connect an agent, you can manage your calendars in plain language — check your schedule, create and reschedule events, build booking links, and set up calendar syncs — across Google Calendar, Microsoft 365 / Outlook, and iCloud, all through a single Model Context Protocol (MCP) endpoint.
Instead of clicking through a dashboard, you tell your agent what you want and it uses CalendarBridge's MCP tools to do it — AI calendar management that works with the assistant you already use.
What your agent can do
Once connected, your agent can:
- Calendars & events — list your calendars, read events for any date range, and create, edit, or delete events.
- Schedulers — list, create, edit, and delete your schedulers.
- Syncs — list, create, edit, and delete one-way or two-way calendar syncs.
- Connected accounts — list your connected calendar accounts and get links to connect, re-authenticate, or remove an account.
- AI assistant — list your AI Scheduling Assistant configurations, review recent conversations, and send a new message or reply through your assistant.
Each action your agent takes is limited to the permissions you grant when you connect (see Choose permissions).
Availability & plans
info
Connecting an agent is available on every plan, including Basic — there is no token to buy and nothing to copy. Performing actions through your agent (reading or changing calendars, creating syncs, and so on) requires an active CalendarBridge subscription. If your subscription lapses, your agent stays connected but each action returns a message asking you to reactivate.
Step 1: Open the Bring Your Own Agent (MCP) tab
Sign in at https://app.calendarbridge.com/login/, open AI Assistant from the side rail, and select the Bring Your Own Agent (MCP) tab.
Step 2: Copy your server URL
The tab shows your CalendarBridge Server URL. It looks like:
https://manageapi.calendarbridge.com/mcp
This single URL is all your client needs. There is no API key or token to copy — your client signs you in with a secure browser login when it connects (see Choose permissions).
Step 3: Add CalendarBridge to your client
Each client adds a remote MCP server a little differently. The tab includes step-by-step instructions for the client you pick; the most common ones are below. Use the Server URL from Step 2 wherever a URL is requested. Client names link to each platform’s official documentation.
| Client | How to add it |
|---|---|
| Claude.ai (web) | Settings → Connectors → the + → Add custom connector. Enter a name and paste the Server URL, then click Add. |
| Claude Desktop | Settings → Connectors → Add custom connector. Enter a name and paste the Server URL. |
| Claude Code | Run claude mcp add calendarbridge --transport http <Server URL>, then type /mcp and authenticate. |
| ChatGPT | CalendarBridge is in ChatGPT's official app directory, so there is no Server URL to paste. Open the CalendarBridge listing (or search for CalendarBridge under Settings → Apps) and click Connect. |
| Cursor | Settings → Cursor Settings → Tools & MCP, add a new MCP server with the Server URL, then click Connect. |
| Codex CLI | Run codex mcp add calendarbridge --url <Server URL>, then type /mcp and select calendarbridge. |
| Grok | Start a chat and click the + → Add connector → Custom. Paste the Server URL and authorize. |
| Manus | Settings → Connectors → Add connectors → the Custom MCP tab → Add custom MCP → Direct configuration. Enter a name, keep the transport type set to HTTP, paste the Server URL, and click Save, then approve access in the browser. |
| Gemini CLI | Run gemini mcp add --transport http calendarbridge <Server URL>, then sign in when Gemini CLI detects the OAuth server (or run gemini mcp auth calendarbridge). |
| Antigravity IDE | In the agent panel: ⋯ → MCP Servers → Manage MCP Servers → View raw config. Add an entry under mcpServers with "serverUrl" set to the Server URL (Antigravity uses serverUrl, not url), save, and refresh. |
| OpenClaw | Run openclaw mcp add calendarbridge --url <Server URL> --transport streamable-http, then openclaw mcp login calendarbridge and approve access in the browser. |
| Hermes | Run hermes mcp add calendarbridge (or add the server under mcp_servers in ~/.hermes/config.yaml with auth: oauth), then hermes mcp login calendarbridge and approve. |
| Any other client | Add a custom or remote MCP server (sometimes called a connector, integration, or tool server): paste the Server URL, choose the HTTP / streamable HTTP transport if asked, and pick OAuth / Sign in for auth — there's no API key, client ID, or secret to enter. |
However you add it, the flow ends the same way — sign in to CalendarBridge in the browser and choose what to allow.
Step 4: Sign in and choose permissions
The first time your client connects, it opens a CalendarBridge sign-in page in your browser. After you sign in, you'll see a consent screen listing the permissions the agent is requesting. Check only the ones you want to grant, then click Allow.
| Permission | What it allows |
|---|---|
| Read your calendar events | List your calendars and read events on them. |
| Create, edit, and delete calendar events | Create, edit, and delete events on your calendars. |
| Read your connected accounts | List your connected calendar accounts. |
| Connect and remove accounts | Get links to connect or re-authenticate accounts, and remove connected accounts. |
| Read your schedulers | List your schedulers. |
| Create, edit, and delete schedulers | Create, edit, and delete your schedulers. |
| Read your calendar syncs | List your calendar syncs. |
| Create, edit, and delete calendar syncs | Create, edit, and delete your calendar syncs. |
| Read your assistants | List your assistant configurations and conversations. |
| Create and modify assistants | Create, edit, and delete your assistant configurations. |
| Send messages through your assistants | Let the agent send new messages and replies through your AI scheduling assistant. |
verified_user
Permissions are enforced on every request: an agent can only use the tools you allowed. You can connect more than one agent and grant each a different set of permissions.
Step 5: Try it out
Once connected, ask your agent things like:
- “What's on my calendar this week?”
- “Schedule a 1-hour meeting called Design review tomorrow at 2pm and invite alex@example.com.”
- “Move my 3pm meeting today to 4pm.”
- “Create a 30-minute scheduler available weekday afternoons and give me the link.”
- “Set up a one-way sync from my work calendar to my personal calendar, showing events as busy.”
- “List my connected accounts and tell me if any need re-authentication.”
Working with your AI Scheduling Assistant
If you’ve set up the CalendarBridge AI Scheduling Assistant, your connected agent can drive it for you — either starting a new scheduling email or replying within an existing conversation.
- Start a new request — e.g. “Ask my assistant to find a 30-minute slot with alex@example.com next week.” Your agent sends the email through your assistant, which takes it from there.
- Reply to a conversation — e.g. “Reply to my latest assistant conversation and propose Thursday at 10am.” Your agent pulls the thread, infers the recipients and subject, and sends your reply. schedule
The assistant works asynchronously, just like over email: sending a message hands it off, and the assistant’s reply arrives a little later. Ask your agent to check your conversations again to see the response.
This needs an assistant configured for one of your connected email accounts and the Send through your assistants permission. If you connected your agent before this permission existed, reconnect it and grant the permission on the consent screen.
Manage connected agents
The Connected agents section of the tab lists every agent that has connected, the permissions it was granted, and when it was last used. To disconnect an agent, click Revoke — it loses access immediately. Re-connecting from the client will prompt for sign-in and permissions again.
Troubleshooting
- “Subscription is not active” — connecting is free, but performing actions requires an active subscription. Reactivate at app.calendarbridge.com and try again. See My account is paid but it is not active.
- The agent can't find an event to edit — ask it to list events first, then act on one from that list.
- A calendar account needs re-authentication — your agent can return a link, or see Reauthorizing calendar access.
- The client won't connect — make sure you pasted the full Server URL exactly as shown on the tab, including
https://.