Video2URL
MCP lets an AI client discover and call approved Video2URL tools.
Hosted MCP Server
npx add-mcp 'https://video2url.com/api/mcp'Installs into Claude Code, Codex, Cursor and more
Documentation
Developer documentation
Build with Video2URL
Evaluate the API, then unlock higher quotas with Pro, Business, or $299 Lifetime.
Get an API key Compare plans →
Use the stateless Streamable HTTP endpoint and authenticate every request with your Bearer key: https://video2url.com/api/mcp.
Recommended
Option A — let your Agent install it
Copy this entire prompt into Codex, Claude Code, Cursor, or another coding agent. The Agent should detect your MCP client and finish the setup with you.
Agent installation prompt
Set up the Video2URL remote MCP server in my current AI coding client. First detect which MCP-compatible client and operating system I am using. Ask me for my Video2URL API key only when needed and never print it back, log it, or commit it to a repository. Configure a server named video2url using the Streamable HTTP endpoint https://video2url.com/api/mcp and the Authorization header Bearer <MY_API_KEY>. Use the correct user-level configuration file for this client, preserve all existing MCP servers, and explain every file you change. Reload or restart the client if required. Then verify the connection by listing the Video2URL tools and confirm that create_upload, complete_upload, get_upload_status, create_share_link, get_share_link, and revoke_share_link are available. If automatic configuration is impossible, give me the exact configuration path and one command or action at a time. Never expose my API key in your final report.
**Expected result:**Restart or reload your client, open its MCP tools list, and confirm that the six Video2URL tools appear. If they do not, check the endpoint, Bearer prefix, and key permissions.
Option B — configure it manually
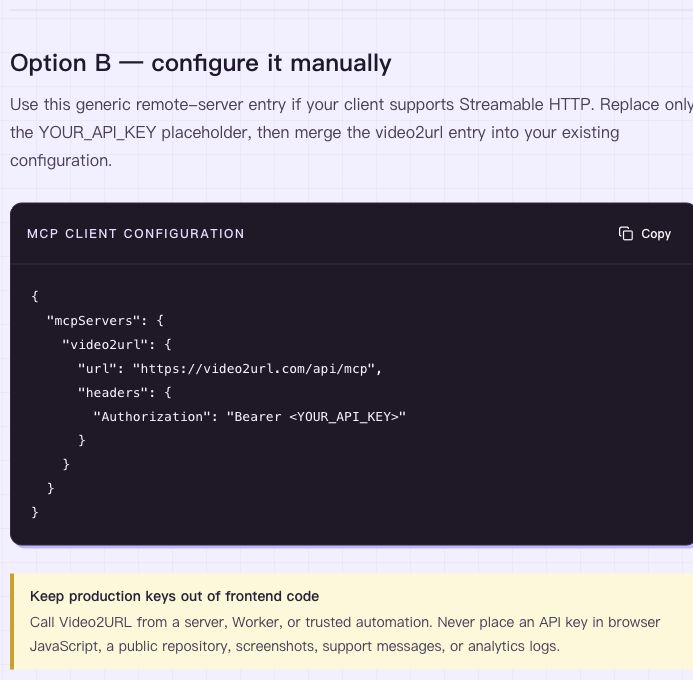
Use this generic remote-server entry if your client supports Streamable HTTP. Replace only the YOUR_API_KEY placeholder, then merge the video2url entry into your existing configuration.
MCP client configuration
{
  "mcpServers": {
    "video2url": {
      "url": "https://video2url.com/api/mcp",
      "headers": {
        "Authorization": "Bearer <YOUR_API_KEY>"
      }
    }
  }
}
Verify the connection
Restart or reload your client, open its MCP tools list, and confirm that the six Video2URL tools appear. If they do not, check the endpoint, Bearer prefix, and key permissions.
create_upload
Requires filename, MIME type, and size in bytes; returns a presigned URL.
complete_upload
Requires uploadId after the raw-file PUT succeeds.
get_upload_status
Requires uploadId and returns upload status plus the file record when ready.
create_share_link
Requires fileId; title, visibility, and password are optional, with visibility defaulting to unlisted.
get_share_link
Requires shareId and returns a share link owned by the authenticated user.
revoke_share_link
Requires shareId and revokes a share link owned by the authenticated user.
For uploads, follow this sequence:
create_upload→ Receive an uploadId and a temporary PUT URL.PUT→ Send the raw file directly to the returned URL.complete_upload→ Verify the stored file.create_share_link→ Receive the final share link.
Upload local files using the MCP server
Developers with an eligible Pro, Business, or Lifetime plan can automate file uploads using our remote MCP server at https://video2url.com/api/mcp with a scoped Bearer API key. Because remote servers cannot read local disks, your local client must read file bytes and perform HTTP PUT uploads directly. Videos, images, and PDFs follow this identical flow.
Configure your API key with uploads:write, files:read, shares:write, and shares:read. Store the Bearer token securely in local client configuration; never paste it into prompts, source code, or public repositories.
-
1. Create the upload record
Inspect your local file to determine its exact filename, MIME type, and size in bytes. Call the create_upload tool to obtain an uploadId, a temporary upload.url, and required upload.headers. -
2. PUT raw file bytes
Perform an HTTP PUT request directly from your client to upload.url, attaching all returned upload.headers. Send raw binary bytes without JSON or multipart wrappers, and never send your Video2URL Bearer token to the storage endpoint. -
3. Finalize upload verification
Call complete_upload with the uploadId. Proceed when the response returns status ready and a valid file.fileId. If the response is pending or uncertain, call get_upload_status and inspect upload.status and upload.file; abort if the upload fails or is rejected. -
4. Generate the share link
Call create_share_link with the confirmed fileId, optional title, and visibility. Capture the returned share.shareId and url, then open the /v/{slug} link in a browser to test playback and controls. -
5. Revoke after testing
To revoke access, call revoke_share_link with the shareId and verify deleted: true. Revoking a share immediately invalidates the link, but it does not delete the stored file or affect already downloaded copies.
These examples illustrate tool arguments rather than live API output. Read sizeBytes from your actual local file (1048576 for 1 MiB is only a sample) and use IDs returned from your specific calls. Tool JSON shows the name and arguments for tools/call requests, not raw JSON-RPC wrappers.
MCP tool arguments — replace returned IDs · create_upload
{
  "name": "create_upload",
  "arguments": {
    "filename": "demo.mp4",
    "mimeType": "video/mp4",
    "sizeBytes": 1048576
  }
}
MCP tool arguments — replace returned IDs · complete_upload
{
  "name": "complete_upload",
  "arguments": {
    "uploadId": "<RETURNED_UPLOAD_ID>"
  }
}
MCP tool arguments — replace returned IDs · get_upload_status
{
  "name": "get_upload_status",
  "arguments": {
    "uploadId": "<RETURNED_UPLOAD_ID>"
  }
}
MCP tool arguments — replace returned IDs · create_share_link
{
  "name": "create_share_link",
  "arguments": {
    "fileId": "<RETURNED_FILE_ID>",
    "visibility": "unlisted",
    "title": "Client preview"
  }
}
MCP tool arguments — replace returned IDs · get_share_link
{
  "name": "get_share_link",
  "arguments": {
    "shareId": "<RETURNED_SHARE_ID>"
  }
}
MCP tool arguments — replace returned IDs · revoke_share_link
{
  "name": "revoke_share_link",
  "arguments": {
    "shareId": "<RETURNED_SHARE_ID>"
  }
}
Local terminal — PUT raw bytes
# Repeat --header for EVERY entry in the returned upload.headers.
# The Content-Type below must be the exact returned value.
curl --fail-with-body --request PUT \
  --header 'Content-Type: <RETURNED_CONTENT_TYPE>' \
  --upload-file './demo.mp4' \
  '<RETURNED_UPLOAD_URL>'
If a step fails
If authentication fails, verify your API key entitlement and ensure all four required scopes are enabled. If a rate limit or quota is exceeded, observe the returned error message before re-attempting. After a network timeout, query the existing upload status before retrying to avoid duplicate uploads or shares. If upload.url expires before transfer finishes, create a fresh upload rather than retrying the expired URL. Always check returned status values in tool payloads rather than assuming HTTP 200 represents success.
Prompt for your AI coding client
Use Video2URL MCP to share only the local test video I explicitly select. Read its actual MIME type and size in bytes. Call create_upload, PUT the raw bytes to the returned URL with all returned upload.headers, and call complete_upload. Wait until the file status is ready before creating an unlisted share with create_share_link. Return the final viewing URL and shareId without disclosing secret keys or temporary upload URLs. Ask me to verify playback on the viewing page, and call revoke_share_link only after I confirm testing is finished. Do not touch any other files, and stop immediately if any step returns an error.
Related questions and topics
Is there an MCP-compatible tool that lets an AI assistant upload a local file and return a share link?
Automating File Sharing with the Video2URL MCP Server
Video2URL provides a remote Model Context Protocol server at https://video2url.com/api/mcp for developers with eligible plans. Your local AI client reads the file, requests upload credentials, pushes the bytes, and returns a verified share link.
Client Architecture and Required Scopes
Because the remote MCP server cannot inspect your local filesystem, your AI client must read local bytes and execute HTTP PUT requests directly. Authenticate using a Bearer token equipped with uploads:write, files:read, shares:write, and shares:read scopes. Developer entitlement on an eligible Pro, Business, or Lifetime plan is strictly required.
Tool Execution Sequence
Your assistant calls create_upload, sends raw file bytes to upload.url with all returned headers (omitting the Bearer token), and calls complete_upload. Once the file status is ready, the assistant invokes create_share_link to generate the final /v/{slug} viewing URL.
The /docs/mcp#manual-setup page displays the remote endpoint URL alongside Bearer token client JSON configuration. Remote MCP endpoint URL Client config with scoped key placeholder Video2URL · English Screenshot reflects the English interface; annotations follow the current language.
Download and run full examples
node upload-share.mjs mcp ./report.pdf application/pdf
How it works
- Configure your local client with https://video2url.com/api/mcp and your scoped API key.
- Call create_upload, PUT raw bytes using upload.headers, then call complete_upload.
- Verify the ready status and call create_share_link to retrieve the URL.
Custom URL Slug
Custom slugs require a Pro or Business plan.
3–48 characters (a–z, 0–9, hyphens), starting and ending with a letter or number. Leave blank to generate automatically.
MCP
create_share_link({
  "fileId": "<FILE_ID>",
  "visibility": "unlisted",
  "customSlug": "product-demo"
})

{ "isError": true, "structuredContent": { "status": "denied", "reason": "custom-slug-conflict" } }
This slug is already taken. Please choose another one and try again.
On this page